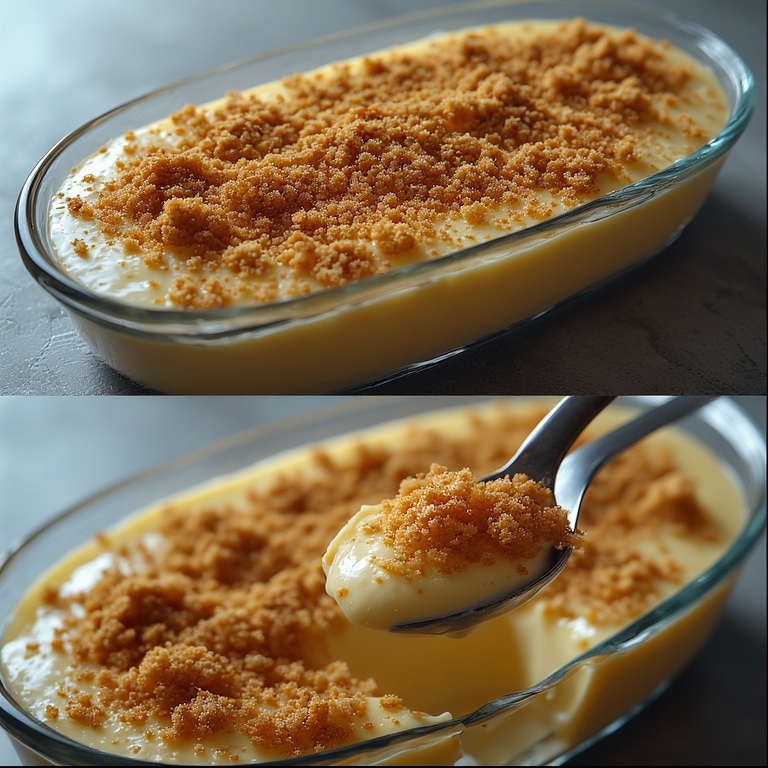
Stop searching for the perfect crowd-pleaser. This Creamy Layered Delight combines a velvety, melt-in-your-mouth custard with a buttery, golden biscuit crunch to create a dessert experience that is both nostalgic and sophisticated. Whether you need a last-minute dinner party showstopper or a comforting weeknight treat, this recipe delivers pure indulgence in every single spoonful.
Imagine sitting on a warm summer evening, a chilled glass in your hand, and a spoonful of the smoothest, most fragrant vanilla custard meeting your palate. As the cool, creamy center melts away, you encounter the delightful, rustic crunch of buttery graham cracker crumbs that provide the perfect textural counterpoint. The aroma of pure vanilla extract dances through the air, mingling with the rich, toasted scent of the biscuit topping. This isn't just a dessert; it’s a sensory escape.
The Creamy Layered Delight has become a cult favorite among home cooks for one simple reason: it hits every note. It is sweet but not cloying, creamy but not heavy, and crunchy yet soft. It bridges the gap between a formal French custard and a cozy, homemade icebox cake. Because it relies on pantry staples and requires very little active labor, it has become the "secret weapon" for hosts who want to impress without spending the entire evening in the kitchen.
Why You Will Absolutely Love This Recipe
- Effortless Elegance: Requires minimal active preparation time but looks stunning when served in clear glassware.
- Make-Ahead Perfection: This dessert actually tastes better after chilling, making it the ultimate stress-free option for hosting.
- Budget-Friendly: Made from simple, accessible ingredients like milk, sugar, and biscuits.
- Texture Heaven: The contrast between the dense, silky custard and the crumbly, buttery topping is addictive.
- Highly Versatile: Easily adaptable for chocolate lovers, fruit enthusiasts, or even cheesecake fans.
The Essential Ingredients
To achieve that professional, high-end pastry chef texture, the quality of your ingredients matters. Here is what you will need to gather:
For the Velvety Custard Filling:
- 4 cups Whole Milk: Do not substitute with skim or low-fat milk if you want true richness. The fat content in whole milk is essential for that luxurious, mouth-coating mouthfeel.
- 1 cup Granulated Sugar: This provides the necessary sweetness to balance the richness of the egg yolks.
- 1/2 cup Cornstarch: This is your thickening agent. It ensures the custard holds its shape while remaining smooth and silk-like.
- 2 Large Egg Yolks: We use only the yolks here to provide an intense golden color and an unparalleled creamy depth that whole eggs simply cannot match.
- 1 tsp Pure Vanilla Extract: Avoid imitation vanilla if possible; pure extract provides the floral, aromatic notes that make this dish feel "gourmet."
For the Buttery Biscuit Topping:
- 1.5 cups Crushed Biscuits: You can use Graham crackers for a classic American taste, Digestive biscuits for a slightly more sophisticated nuttiness, or Vanilla wafers for a sweeter profile.
- 4 tbsp Unsalted Butter (Melted): The butter acts as the "glue" that binds the crumbs together and adds a savory, rich element to the topping.
- Prepare the Golden Biscuit Topping: Begin by crushing your chosen biscuits (Graham crackers, Digestives, or vanilla wafers) until they reach a coarse, sandy texture. You want some fine dust and some larger, crunchy bits for texture. In a small mixing bowl, combine these crumbs with the melted unsalted butter. Stir thoroughly until the mixture looks like wet sand. Expert tip: Set aside about 1/4 cup of this mixture in a separate small bowl; you will use this at the very end to sprinkle a fresh, crunchy layer on top before serving.
- Create the Custard Base: In a medium-sized, heavy-bottomed saucepan, whisk together the whole milk, granulated sugar, and cornstarch. It is vital to whisk them while the milk is still cold to ensure the cornstarch is fully dissolved; if you add cornstarch to warm milk, you will end up with unpleasant lumps. Once combined, place the saucepan over medium heat and begin whisking constantly. Do not walk away from the stove! The constant motion prevents the milk from scorching at the bottom of the pan.
- Master the Art of Tempering the Eggs: This is the most critical step to ensure your custard is smooth rather than "scrambled." In a separate small bowl, whisk your two egg yolks until they are pale and slightly frothy. Now, very slowly, ladle about half a cup of the warm milk mixture into the egg yolks, whisking vigorously with every addition. This slowly raises the temperature of the eggs without cooking them instantly. Once the egg mixture is warm and tempered, slowly pour the entire egg mixture back into the main saucepan with the rest of the milk.
- Thicken to Perfection: Continue cooking the mixture over medium-low heat, whisking continuously. As the cornstarch reaches its thickening point, you will notice the liquid transform from a thin milk to a heavy, glossy pudding. Keep stirring until the mixture thickens enough to coat the back of a spoon and just begins to release a few large, lazy bubbles. Once it reaches this consistency, remove the pan from the heat immediately. Stir in the pure vanilla extract to preserve its delicate aroma, which can dissipate if boiled too long.
- Assemble the Layers: Pour the warm, silky custard into a clear glass serving dish—a large trifle bowl works beautifully—or portion them into individual ramekins for elegant single servings. While the custard is still warm, evenly spread your prepared buttery crumb mixture over the top. The heat from the custard will help the crumbs settle slightly into the surface, creating a beautiful marriage of layers.
- The Essential Chill: Allow the dessert to cool to room temperature on your kitchen counter. Once cooled, cover the dish tightly with plastic wrap (ensure the wrap doesn't touch the surface of the custard to prevent a "skin" from forming) and refrigerate for at least 3 to 4 hours. For the absolute best results, let it set overnight. This allows the flavors to mature and the textures to firm up into that signature "icebox" consistency.
- The Sieve Trick: For an ultra-luxurious, professional-grade custard, pour your finished custard through a fine-mesh sieve before assembling. This catches any tiny bits of cooked egg or undissolved starch, ensuring a perfectly homogenous texture.
- Use Heavy-Bottomed Pans: Always use a heavy saucepan. Thin pans create "hot spots" that can easily scorch the milk or sugar, leaving a burnt taste in your delicate dessert.
- Don't Skimp on the Yolks: Some recipes call for whole eggs to save money, but the yolk is where the magic happens. The lecithin in the yolks provides the emulsification that makes the custard creamy rather than watery.
- Temperature Control: When tempering, go slow. If you pour the hot milk too quickly into the eggs, you will create little bits of cooked egg that are impossible to whisk out later.
- Preventing the "Skin": If you are making this in a large dish, press plastic wrap directly onto the surface of the custard while it's still warm to prevent a thick skin from forming as it cools.
- The Fruit Infusion: For a refreshing twist, add a layer of thinly sliced bananas or fresh, macerated strawberries between the custard and the crumb topping. The acidity of the fruit cuts through the richness of the cream perfectly.
- The Chocolate Lover’s Dream: As soon as you remove the hot custard from the heat, stir in 1/2 cup of high-quality semi-sweet chocolate chips. Let them sit for a minute before stirring to ensure a smooth, chocolatey pudding consistency.
- Cheesecake-Style Delight: For a tangy, sophisticated version, whip 4 oz of softened cream cheese into the hot custard before pouring it into the dish. This creates a flavor profile reminiscent of a classic New York cheesecake.
- The Nutty Crunch: Replace half of your biscuit crumbs with finely crushed toasted pecans or walnuts to add an extra layer of earthy flavor and sophisticated crunch.
Step-by-Step Instructions for Perfection
Pro Tips & Secrets for Success
To elevate this recipe from "good" to "unforgettable," keep these professional secrets in mind:
Delicious Variations & Substitutions
One of the reasons this recipe is a staple is its incredible ability to transform based on your cravings:
Serving Suggestions & Perfect Pairings
To serve, remove the dessert from the refrigerator just before dining to ensure it is perfectly chilled. If you saved that extra 1/4 cup of crumbs, sprinkle them generously over the top right before serving to provide a fresh, crunchy contrast to the set custard.
Plating Ideas: Serve in individual crystal coupes or vintage glass ramekins for an upscale feel. A single mint leaf or a few fresh raspberries on top adds a pop of color that makes the dish look professionally catered.
Drink Pairings: This light, creamy dessert pairs beautifully with a delicate Earl Grey tea, where the bergamot notes complement the vanilla. For a more indulgent experience, serve it alongside a glass of chilled dessert wine, such as a late-harvest Riesling or a light Moscato.
Make-Ahead, Storage & Reheating Tips
Make-Ahead: This is the ultimate make-ahead dessert! You can prepare this up to 24 hours in advance. In fact, letting it sit overnight in the fridge allows the custard to set firmly and the flavors to meld.
Storage: Keep your Creamy Layered Delight tightly covered in the refrigerator. It will stay fresh and delicious for up to 3–4 days.
Frequently Asked Questions (FAQ)
Can I use skim milk instead of whole milk?
While you can use skim milk, it is not recommended. The richness and "velvet" feel of this dessert come directly from the milk fat. Using skim milk will result in a thinner, less satisfying mouthfeel.
Why did my custard turn out lumpy?
Lumps usually occur for two reasons: either the cornstarch wasn't whisked thoroughly into the cold milk at the beginning, or the eggs were added too quickly during the tempering process. If this happens, simply pass the warm custard through a fine-mesh sieve to smooth it out!
Can I make this dessert dairy-free?
Yes! You can substitute the whole milk with full-fat canned coconut milk for a similar richness, and use a plant-based butter substitute for the biscuit topping. Ensure your biscuits are also dairy-free (check the label for milk solids).
Is it possible to make this without egg yolks?
You can use a cornstarch-only method, but the flavor and color will change significantly. The egg yolks provide a natural golden hue and a level of richness that starch alone cannot replicate. If you must skip them, consider adding a tiny bit more vanilla to compensate for the lost flavor depth.
Conclusion: Your New Favorite Dessert Awaits
The Creamy Layered Delight is more than just a recipe; it is a testament to how a few humble ingredients can be transformed into something truly extraordinary through a little bit of culinary technique. It strikes that rare, perfect balance between simplicity and sophistication, making it an essential addition to your dessert repertoire.
Whether you are treating yourself after a long week or looking to wow your guests at your next gathering, this recipe is guaranteed to deliver. It is foolproof, customizable, and—most importantly—absolutely delicious. Don't wait! Grab your whisk, head to the kitchen, and create your own masterpiece today.
If you loved this recipe, please leave a comment below telling me how it turned out, or share this post with a fellow dessert lover! Happy cooking!